Accessory Guides
Sort by: 
1-7 of 7
Choosing Eyepieces
5.0 / 5.0

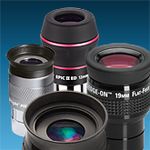
A telescope simply will not work without an eyepiece. The optical elements of an eyepiece allow you to focus light collected by a telescope, so you can observe a sharp view of the object or area where the telescope is pointing. With an eyepiece installed in the telescope focuser, you can bring extremely distant objects into focus for magnified study.   

While most new telescopes include one or two eyepieces to get started with, purchasing additional eyepieces can significantly increase the functionality of any telescope, new or old.

Let's take a few moments to learn a bit more about the most common terms and specifications used to describe features of telescope eyepieces. With this knowledge, you'll be well-prepared to select ideal eyepieces for your own telescopes.

Focal Length and Magnification
Perhaps the most important specification of an eyepiece is its focal length. The focal length of an eyepiece, along with the focal length of the telescope the eyepiece is used with, determines the magnification the combination provides.

So the first step in choosing eyepieces is to decide what magnifications, or powers, you want to use and what eyepiece focal lengths will give them. Since both eyepiece and telescope focal lengths are expressed in millimeters, the formula used to determine magnification is:

Magnification = Telescope focal length (mm) ÷ Eyepiece focal length (mm)

Or, put another way,

Eyepiece focal length (mm) = Telescope focal length (mm) ÷ Magnification

For example, a telescope with a 2000mm focal length used with a 20mm eyepiece will give 100 power (2000 ÷ 20 = 100).

The above formula dictates that a telescope eyepiece with a shorter focal length yields a higher magnification than an eyepiece with a longer focal length. For example, a 10mm eyepiece will always provide a higher magnification than a 25mm eyepiece. This relationship is important to remember while choosing eyepieces: the lower the eyepiece focal length, the higher the relative magnification will be. The actual magnification will depend on the focal length of the telescope the eyepiece is used with.

If you've ever used a single telescope at different powers, you know that you have a choice of a small, sharp, bright image at lower magnification; or a big, blurred, dim image at higher power. The reason is twofold. First, the telescope gathers a fixed amount of light, and at higher magnifications, or powers, you're spreading the same amount of light over a larger area, so the image will always be dimmer. Second, because light consists of waves, even an optically perfect telescope picks up only a limited amount of fine detail in the image. Magnifying the image beyond a certain point does not reveal more; it just makes the image look blurry. This is called "empty magnification" and can change depending on the object or area viewed.

Field of View: Apparent and True

A telescope eyepiece's apparent field of view is the angular diameter, expressed in degrees (°), of the circle of light that the eye sees. It is similar to the screen of a television (not the actual picture seen on it). Most eyepieces have an apparent field of about 40° to 50°. Specialized wide-field telescope eyepieces can boast apparent fields ranging from 60° to 100° or more. Such wide-field and Ultra-Wide eyepieces are preferred by amateur astronomers who enjoy the "spaceship porthole" effect of using as wide a field as possible.

The true field (or real field) of view is the area of sky seen through the eyepiece when it's attached to the telescope. The true field can be approximated using the formula:

True Field = Apparent Field ÷ Magnification

For example, suppose you have an 8" Cassegrain telescope with a 2000mm focal length, and a 20mm eyepiece with a 50° apparent field. The magnification would be 2000mm ÷ 20mm = 100x. The true field would be 50 ÷ 100, or 0.5° - about the same apparent diameter as the full Moon.

Eye Relief and Corrective Lenses

The optical design of an eyepiece determines the eye relief, which is the distance from your eye to the eyepiece lens when the image is in focus. If you wear corrective lens eyeglasses while using a telescope, we recommend looking for telescope eyepieces with at least 15mm, and more preferably 20mm, of eye relief to see the entire field of view comfortably. With insufficient eye relief the outer portion of the viewing field will be cut off, resulting in a "keyhole effect" which can be frustrating.  In more traditional telescope eyepiece designs, eye relief is proportional to focal length: the shorter the focal length, the shorter the eye relief. However, some of the more modern eyepiece designs provide luxuriously long eye relief regardless of focal length -- a real boon to eyeglass wearers. If you like to keep your eyeglasses on while using a telescope, the eye relief of an eyepiece is a very important specification to consider.

Barrel Size
Most quality telescope eyepieces come in two different barrel diameters, 1.25", and 2". A smaller, 0.965" barrel size is found mostly on low-end "department store" telescopes and should be avoided, if possible. Most amateur telescopes are designed to accommodate the 1.25" eyepiece size. Larger 2" eyepieces are typically used with larger aperture telescopes that feature a 2" focuser. Big 2" eyepieces traditionally feature long eye relief for comfortable views, and they often offer wider fields of view compared to 1.25" eyepiece models.

Optical Correction

The main goal of any telescope eyepiece design is to get all the light rays collected by the telescope to form a sharp image. Depending on the f-ratio of the telescope, this can be a difficult task. Telescopes with low f-ratios require more highly corrected eyepieces because the cone of light entering the eyepiece is converging more sharply. With a relatively low f-ratio telescope, such as an f/4 optical tube, only the best modern eyepieces will yield completely sharp images all the way out to the edge of the field of view. Some older designs may result in blurred views around the edge of the field of view, but the center will remain sharp. In telescopes with a relatively high f-ratio, such as an f/10 telescope, any well-made eyepiece will give a sharp image.

How Exit Pupil Relates to Power

The powers or magnifications at which a telescope will work well depend on the aperture of the instrument. In general, a larger telescope gathers more light and captures a broader wavefront, giving sharper images. One handy way to classify powers is in terms of "power per inch" of aperture. For example, 80x on an 8"-aperture telescope is 10 power per inch. Another way is to go by the size of the exit pupil. The term "exit pupil" describes the size of the bundle of light rays coming out of the eyepiece. Exit pupil size in inches is the reciprocal of power per inch. More commonly, exit pupil size is calculated in millimeters using these formulas:

Exit pupil size (mm) = Telescope aperture in mm ÷ Telescope magnification

Exit pupil size (mm) = Eyepiece focal length in mm ÷ Telescope f-ratio

The exit pupil must be smaller than the pupil of your eye, or else some of the light rays will not make it into the pupil, meaning the light will essentially be wasted. A young person's fully dark-adapted eyes may have 7mm-wide pupils. As you age, maximum pupil diameter decreases. For middle-aged adults, the practical maximum is closer to 5mm.

At the other end of the scale, at magnifications that yield an exit pupil in the range of 0.5mm to 1.0mm, empty magnification begins to set in, depending on the quality of your telescope and your eyes. In other words, this much magnification really starts to degrade the image you see. Here's a table of how various powers stack up:

Power Range Exit Pupil Size Power Per Inch Power (3" Telescope) Power (8" Telescope) What It's Used For
Very Low 4.0 - 7.0mm 3 - 6x 10 - 18x 28 - 50x Lowest usable power. Wide-field views of deep-sky objects under dark skies.
Low 2.0 - 4.0mm 6 - 12x 18 - 36x 48 - 100x General viewing; finding objects; most deep-sky observing.
Medium 1.0 - 2.0mm 12 - 25x 36 - 75x 100 - 200x Moon, planets, more compact deep-sky objects, wide double stars.
High 0.7 - 1.0mm 25 - 35x 75 - 100x 200 - 280x Moon and planets (in steady air), double stars, compact clusters.
Very High 0.5 - 0.7mm 35 - 50x 100 - 150x 280 - 400x Planets and close double stars in very steady air.


What Does Parfocal Mean?
Eyepieces that are "parfocal" can be interchanged without the need for refocusing. This is desirable (but not necessary) when switching eyepieces while looking at the same object. Often, eyepieces of the same design, from a given manufacturer, will be parfocal. But the same eyepiece design from different manufacturers will likely not be parfocal. Some parfocal eyepieces may require a nominal amount of focus adjustment.

Illuminated-Reticle Eyepieces
These telescope eyepieces have etched crosshairs or other reticle grid patterns at the focal plane that can be illuminated so they're easily visible in the dark. An external illuminator arm incorporating a small red LED light, a button-cell watch battery or two, and a potentiometer for varying the brightness is screwed into the specially made eyepiece. An illuminated reticle eyepiece is needed for manual guiding exposures in astrophotography, and is useful for aligning a finder scope with the main telescope. It also comes in handy when drift-aligning an equatorial mount, or performing an alignment procedure for a computerized GoTo or IntelliScope system. Due to the presence of crosshairs in the field of view, illuminated reticle eyepieces aren't recommended for normal viewing through a telescope, although they can prove very useful for specific applications. 

So, How Many Eyepieces Do I Really Need?
The short answer is a few. The long answer depends on your own goals. You can observe for a long time with one low-power and one high-power telescope eyepiece, although eventually you will want a few more focal lengths for more magnification options. Avoid the temptation to go all the way to the limits (very low and very high) until after you've filled in the middle range. For example, for an f/10 telescope, a 25mm and a 9mm eyepiece make a good starter set; you can add something around 15mm and perhaps 6mm next, and so on.

With a several different telescope eyepieces, you have a better chance of hitting the optimal power for the particular object you are observing, given the sky conditions at the time. Usually, you'll want to start out with low power (i.e., long eyepiece focal length, such as 25mm or 30mm) to get the object in the field of view of the telescope. Then you might try a slightly higher-power (shorter focal length, maybe 18mm or 15mm) eyepiece and see if the view looks any better. If it does, swap in an even higher-power eyepiece, etc., until you hit that "sweet spot" where image brightness, image scale, and the amount of visible detail combine to form the most pleasing view. Remember: higher power doesn't necessarily equal a better view.

To Zoom or not to Zoom?

Some telescope eyepieces provide a range of different focal length settings. Such "zoom" eyepieces can be very convenient if you don't like the idea of storing and carrying a number of separate eyepieces in order to use different magnifications. Many amateur astronomers enjoy using zoom eyepieces since they make it possible to increase or decrease power without swapping out eyepieces from the telescope focuser. In general, zoom eyepieces do not perform quite as admirably as single focal length eyepieces, due to the fact they are typically made with more optical elements, which can reduce overall image brightness and clarity. However, many amateur astronomers consider the increased versatility and convenience of a zoom eyepiece to be preferable to an assortment of single focal length eyepieces. Many high-end premium zoom eyepieces are designed to optimize performance, but they can be a bit pricier than other zoom eyepieces.   

Using a Barlow Lens with Eyepieces
You can also use a 2x Barlow lens to boost the power (or reduce the effective focal length) of any eyepiece by a factor of two. Thus, instead of a 3mm eyepiece, you can use a 6mm eyepiece with a 2x Barlow lens and get the same magnification. Using a Barlow is easy: just insert an eyepiece into the Barlow lens, then insert the Barlow/eyepiece combination into the telescope focuser and adjust until the image is sharp. By using a Barlow lens you can get away with having fewer eyepieces in your collection, while still having a variety of magnifications at your disposal. To gain the maximum benefit from the Barlow lens, choose eyepiece focal lengths that are not multiples of each other. In other words, if you have eyepieces of 25mm, 12.5mm, and 6mm - multiples of 2 - then a 2x Barlow won't provide much in the way of additional magnifications. But if your eyepieces are 25mm, 15mm, and 10mm, then use of the 2x Barlow with each, respectively, will provide 12.5mm, 7.5mm, and 5mm effective focal lengths - just like having three additional (and different!) eyepieces. Since Barlow lenses add glass elements into the light path, you may notice a slight dimming of the image when alternating from an eyepiece to a Barlow and eyepiece combination. Barlow lenses are also available in 3x and 5x models for those looking to significantly increase power. 

Closing Thoughts

Using different eyepieces can profoundly increase the versatility and functionality of any telescope. While shopping for eyepieces, remember these basic tips:

  • Consider the focal length of your telescope, or telescopes, to make sure the eyepiece will provide an appropriate magnification to suit your needs.
  • If you wear eyeglasses while using a telescope, pay attention to the eye relief specification of different eyepieces, as ample eye relief can improve comfort and ease-of-use while wearing corrective lenses.
  • Depending on your observing goals, consider the apparent field of view of your eyepiece choices.
  • If versatility is paramount, consider a zoom eyepiece or Barlow lens to increase the amount of possible magnifications to use.

Keep in mind the specifications described above and you're sure to choose an ocular that will provide you with night after night of enjoyment with your telescope(s). And remember, Orion is here to help with any questions you have along the way. Just send us an email at sales@telescope.com, contact us via live chat, or and we'll help you find the right telescope eyepieces.

Clear skies!


Not Available
Filter Types
5.0 / 5.0

What do you do on a sunny day? Chances are you slip a pair of polarized sunglasses over your eyes. They cut down glare and appear to make colors, such as a cobalt-blue sky, look snappier.

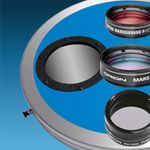
Backyard astronomers do the same thing when they thread eyepiece filters into a telescope eyepiece to, say, cut the Moon's glare or bring out cloud bands on Jupiter. Eyepiece and telescope filters improve the view. And in the case of solar observing, they actually provide a safe way to look at the Sun directly.

Solar FiltersSolar Filters
Solar filters come in two main varieties: metal-coated black-polymer film and glass. In both instances, it's a metal alloy electrostatically applied to a surface that filters out the Sun's blinding intensity and harmful infrared radiation. Glass solar filters typically slip over a telescope's front aperture to block the light before it enters the scope. Film solar filters can be found in rolls or sheets of material that is wrapped around the front of a telescope, and more deluxe versions can have a plastic filter cell specially fitted for the front aperture of the telescope.

By some measures, glass solar filters offer greater durability than foil-like black-polymer film. On the other hand, black polymer can take an occasional drop on the ground without worry of cracking or shattering, like glass. The type of metal coating applied to black polymer film makes the Sun appear blue or neutral-white, while the coating on glass solar filters yields a more realistic yellow image.

Solar filters designed to fit a telescope eyepiece should be avoided. They are extremely dangerous because they sit right where the sunlight is most concentrated (focused). Remember burning dried leaves with a magnifying glass when you were a kid? Well, likewise, the heat that builds up at the eyepiece will eventually cause the filter to crack, which can permanently damage your eyes. If you come across a filter like this, get rid of it. See our handy solar filter reference chart to find the right solar filter for your telescope or pair of binoculars.

Moon Filter Before and AfterMoon Filters
Believe it or not, you're also dealing with bright, albeit reflected, sunlight when you turn your scope on the Moon. A noncrescent Moon will consistently leave spots even in a hardened lunar observer's eyes, although this will not damage your eyes.

To tone down the glare, a Moon filter can be used. This inexpensive accessory threads into a telescope eyepiece and blocks a large percentage (typically over 80%) of the light, making for more comfortable viewing and bringing out more lunar surface details.

A variable-polarizing Moon filter is a little fancier, allowing you to "dial in" the amount of light reduction you want. In so doing, it acts as something of a dimmer switch for your telescope. Such variable-polarizing filters actually consist of two polarized filters mounted in a rotating housing, which you turn to adjust the brightness. Double star observers often use variable polarizers to distinguish, or enhance, tightly paired targets that sometimes smear together in each other's light.

Planetary Color FiltersPlanetary (Color) Filters
Backyard observers also utilize an array of color eyepiece filters to glean subtle features on the planets. Earth's atmosphere is in constant fluctuation; turbulent air currents blur fine surface detail on solar system objects, like planets, viewed through a telescope. Faint, contrasting areas blend together due to irradiation - distortion of the boundaries between light and dark areas. Using color eyepiece filters can help reduce such distortion.

A color filter zeros in on a narrow region of the spectrum, reducing the scattering of interfering wavelengths. Because many planets have a characteristic color (e.g., Mars is reddish), a filter can dramatically increase detail by reducing the predominant hues and uncovering hidden contrast and surface markings. That's why the Red Planet is most effectively enhanced with a green filter. Each color eyepiece filter passes its characteristic color of light while blocking complementary colors. For example, green objects will appear bright (pale) through a green filter, and dark through a blue or red filter. Red features will appear bright through a red eyepiece filter and dark through a green or blue eyepiece filter.

Telescope eyepiece filters thread into the barrel of an eyepiece. Usually the aluminum cell holding the filter is threaded such that two or more can be "stacked," to achieve simultaneous filtering of more than one color.

Filter with EyepieceColor filters go by their "Wratten" numbers. Here is a rundown of the color eyepiece filters that are useful for enhancing detail on each planet and some other objects.

Mercury
#25 Red will make the planet's disk stand out against a blue sky, permitting daytime or twilight viewing. Mercury is usually best observed just after sunset, when the sky is awash in orange light, so employ #21 Orange with high magnifications to see the planet's phases.

Venus
No matter what telescope aperture you use, Venus's excessive brightness usually causes a very "overexposed," roiling image. With a #47 Violet filter, or stacked #58 Green and #80A Medium Blue filters, you'll reduce the severe twinkling for a better view of the fascinating changing phases.

Mars
#25 Red passes the predominant reflections of surface plains and maria, and #21 Orange is good for reducing the intense glare to enhance detail and mottling. The polar caps stand out with #15 Deep Yellow and #80A Medium Blue; examine the melt lines with #58 Green.

Jupiter
This great planet reveals its cloud bands, loops, festoons, ovals, and Red Spot with #80A, #58, and #21. Go from seeing only two bands without a filter to seven or more with a filter! Try stacking filters to reduce the heavy glare.

Saturn
Many subtle details are improved by #15 Deep Yellow. See the difference in brightness of the extremes of the rings with #25, #58, or #80A. The #15 filter also helps sharpen Saturn's image in photographs, improving the resolution of the Cassini division.

Moon
Reduce the Moon's glare with #80A Medium Blue, and enhance the contrast of lunar rilles and strata with #15 Deep Yellow.

Other Uses
You will improve black-and-white photographs by blocking UV light with #15 Deep Yellow filter. Refractor chromatic distortion is also reduced by #15, and by #80A filters. The #82A Pale Blue filter is great for stacking with other colors, and can adjust film color balance by absorbing excess yellow and red. #58 Green will block street light while passing much of the wavelength of doubly ionized oxygen in emission nebulas. Try #25 Red for long black-and-white exposures of the Omega or Rosette Nebulas.

SkyGlow FilterDeep-Sky Filters
One very useful weapon in the fight against light pollution is a light-pollution filter. So-called broadband filters, like the Orion SkyGlow, effectively block the wavelengths of light generated by incandescent, sodium, and mercury-vapor lights, which brighten the evening skies in cities and suburbs, while letting through the desirable wavelengths emitted by galaxies and emission nebulas (hydrogen alpha, hydrogen beta, and oxygen III). This type of eyepiece filter is also popularly called a light-pollution-reduction, or LPR, filter. Bright, light-polluted skies appear much darker, and the contrast between object and sky is improved significantly.

Ultrablock FilterNarrowband eyepiece filters, such as the Orion UltraBlock, allow an even narrower range of wavelengths through. This type of eyepiece filter is often called a "nebular filter" because it is particularly effective in enhancing detail and contrast of emission and planetary nebulas. Galaxies and reflection nebulas don't benefit much.

Narrowband eyepiece filters block all forms of light pollution, including wavelengths from incandescent and fluorescent lighting, which broadband filters cannot stop. So they are effective in areas with severe light pollution. They will transform a poor, milky-sky urban backyard into something useable for deep-sky observing.

Still, their effect is most dramatic under a truly dark sky.

Other deep-sky eyepiece filters are "tuned" with bandpasses intended for the light of specific targets. Oxygen III, or O-III, filters are optimized for planetary nebulae. H-beta eyepiece filters convey the blue-green luminescence of faint emission nebulae like the Horsehead or California Nebulas. And comet filters permit the passage of light given off by, of all things, glowing cyanogen gas that surrounds comets.

So, thanks to a whole battery of eyepiece and telescope filters we can see things that run the gamut from sunspots to the shattered remains of an exploded star. If you enjoy even a moderate amount of observing, you will benefit by having a few filters at your disposal. Chances are, you will reach for an eyepiece filter at night as often as you reach for sunglasses on a sunny day.

They almost always improve the view!


Not Available
About Finder Scopes
4.5 / 5.0
If you had to define the term "exercise in futility," you might consider, "finding an object in the night sky with a telescope without using a finder scope."

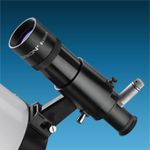
In general, a finder scope is a very small telescope that rides piggyback on the main telescope. Its purpose is simple: to aid in aiming the main telescope toward objects of interest. By virtue of low magnification and a wide field of view, the finder scope allows you to see more of the sky than you can through the main telescope. This wider field of view allows you to locate objects of interest easily, so you can study them at higher magnifications with the main telescope.

Once you locate an object of interest in the sky with the finder scope, center it on the finder scope crosshairs by adjusting the position of the telescope. Now, when you look in the main telescope - voila! - the object will be waiting right there for you in the telescope eyepiece. This method can be used whether the object of interest is a crater on the relatively close-by Moon, or a faint galaxy tens of millions of light years distant.

Types of Telescope Aiming Devices and Finder Scopes
Orion offers three main types of aiming devices: achromatic finder scopes, reflex sights, and bracketed green laser pointers. Within these three main categories of aiming devices, there are also different models of finder scopes and reflex sights available with specialized features and functionality. You can use just one of these aiming tools to help point your telescope, but many amateur astronomers have found that having more than one aiming device on the same telescope can make aiming easier than using a single device.

Let's take a moment to find out what the major differences are between the different types of aiming devices:

Achromatic Finder Scopes
An achromatic finder scope is itself a miniature refracting telescope that uses glass lenses to gather and focus light. Most offer modest magnification on the order of 5x to 10x, and a field of view of 5° or more. A 6x30 finder scope is a common model. The 6 is the magnifying power, while the 30 represents the diameter, or aperture, of the main lens, in millimeters.

Different models of achromatic finder scopes are equipped with different features which can help to make aiming a telescope more accurate, more comfortable, and more convenient.

Straight Finder Scopes
Standard straight finder scopes are the simplest design of magnified aiming device. They transmit light gathered by the objective lens through the finder scope barrel to the eye lens, which sticks straight out the back of the finder barrel. You just peer into the eye lens to see a wide-field magnified view of where the finder scope is pointing, and therefore where the telescope is pointing.

Beginners are often surprised that the image in a standard finder scope is upside-down (rotated 180°). That's normal (though perhaps not ideal) for any refractor used without a correcting prism. It's not that big of a deal, however, since all you're trying to do is center the object on the crosshairs. Whether it's upside down or not doesn't much matter, though it does make navigation by star-hopping a little trickier.

Right-Angle Correct-Image Finder Scopes
Unlike standard straight finder scopes, specialized right-angle correct-image designs employ a right-angle prism to bend the path of gathered light 90° and correct the inverted (upside-down) view. The benefits of such a finder scope are twofold. Many astronomers prefer the right-angle positioning of the eye lens as a more comfortable alternative to straight finders, especially when trying to locate a celestial object that is near the zenith of the night sky, straight overhead. The correct-image view makes it easy to make accurate position adjustments of the main telescope, since the view in the finder matches the naked-eye view of the sky.

Illuminated Reticles and Standard Cross Hairs
All finder scopes feature some type of cross hair reticle which is visible when you look through the finder scope. Using the cross hair pattern, you can easily center an object of interest in the finder scope's field of view, so it will be visible in the eyepiece of the main telescope the finder is aligned with.

Some achromatic finder scopes have standard black cross hair reticles, while other so-called "illuminated reticle" models feature a small red LED light which illuminates the cross hairs for easier detection at night. On especially dark nights, it can prove difficult to see standard black cross hairs against the dark background of the black sky. Orion Illuminated Reticle Finder Scopes employ double cross hairs which form a small box around the center of the finder field of view. Centering an object is as easy as placing it in the illuminated box! Illuminated reticle finder scopes require button-cell batteries to power the illuminator.

Focusing the Finder Scope
Most achromatic finder scopes have an adjustment ring that allows the image to be focused for your eyesight. Focusing is done by moving the objective (front) lens in or out by adjusting the knurled ring near the front of the finder. Consult the instruction manual that came with your telescope or finder scope to learn more about focusing.

The Bigger the Finder, the More You'll See
With finder scopes, as with any telescope, the bigger the diameter of the light-collecting lens or mirror (i.e., the aperture), the more you'll be able to see with it. Greater light-grasp translates into being able to see fainter objects and finer detail. So larger, more expensive 8x40 or 9x50 finder scopes garner more light to pull in fainter targets and, more importantly, dimmer stars. Such large-aperture finders are popular add-on accessories for telescopes of 6" and greater apertures.
If the object you're targeting is too faint to be seen in the finder scope, then you have to aim where you think it is and "sweep" the area a little with small circular motions of the main telescope until it appears in the eyepiece. This can require a bit of practice, but the satisfaction of finding a celestial object on your own, without computerized assistance will be worth it!

Reflex Sights, or "Red Dot" Finders
A refreshingly simple type of aiming device is called a reflex sight, or "red dot" finder. It is a non-magnifying aiming tool that displays a red, LED-lit bull's-eye pattern or red dot in the center of the finder's field of view. The red dot appears superimposed on the sky, showing exactly where the telescope is pointed (once properly aligned, of course).

While a reflex sight can only be used to locate objects that are visible to the naked eye, its main advantage is that it does not invert or flip the image like a standard finder scope does. It also has a very wide field of view. So it makes star-hopping very easy and intuitive. Using a reflex sight is easy - just look on a star chart, locate a celestial object's position relative to bright nearby stars, or its position within a recognizable constellation or asterism. Move the main telescope to place the reflex sight's red dot on that spot, and, presto, the object is right there in the main telescope's eyepiece.

Like achromatic finder scopes, different types of reflex sights are available. Some especially affordable models offer a single red-dot aiming pattern, while other more deluxe models offer a variety of different reticle patterns and brightness settings which are preferable to many amateur astronomers.
Because standard finder scopes and reflex sights each have their own merits, many amateur astronomers use them both, mounting them side by side on their telescopes.

Green Laser Pointers
Many amateur astronomers enjoy using a green laser pointer to help aim their telescope. To use a laser pointer as an aiming device, a specially designed bracket is required which both holds the pointer and allows it to be aligned with the main telescope. With such a bracket attached to your telescope, a green laser pointer can be used as a high-tech aiming tool.

Bracketed green laser pointers can be used as the main aiming device, but they are also commonly used as a secondary aiming tool in addition to a finder scope and/or reflex sight to help aim the main telescope with precision.

CAUTION: Always use green laser pointers responsibly! Never aim them anywhere near people, animals, moving vehicles, aircraft, or windows.

IMPORTANT NOTE: Remember to power-off the laser pointer once you've completed aiming the telescope at your target celestial object by loosening the ON/OFF collar thumbscrew before you observe through the attached telescope, to both prolong battery life and avoid unintentional pointing of the laser at passing aircraft, animals, etc.

Align then Find
Finder scopes and other aiming devices will only work if they have first been aligned with the main telescope, so the two instruments are aiming at exactly the same spot. That's easy to do.

Aligning Finder Scopes and Reflex Sights
To avoid hassle, align a finder scope or reflex sight while it's still light outside. A good time to perform aiming device alignment is after the telescope has been set up but before the Sun goes down.

First, put a low-power (long focal length) eyepiece in the focuser of the main telescope. Looking into the telescope eyepiece, center a distant stationary object in the field of view - the top of a telephone pole, a treetop, or a chimney on a house. The object should be at least a quarter-mile away to optimize precise alignment of the finder scope. Selecting an even more distant object will improve accuracy. Now, without moving the main telescope, carefully look through the finder scope and see if the object appears in the center of the finder scope's field of view (where the crosshairs intersect). If it does not, use the adjustment screws on the finder scope bracket to adjust the aim of the finder scope until the object is centered on the crosshairs. For reflex sights, use the adjustment knobs to adjust the aim of the red-dot sight until the object is centered in the viewing window. You may want to power on the reflex sight so you can see the red-dot.

Once the object is centered in either the finder scope or reflex sight, look back into the telescope eyepiece and make sure the object is still centered there as well. If it is, you're done. If it is not, repeat the procedure, being careful not to move the main telescope while you're adjusting the position of the finder scope or reflex sight.

When the distant object is centered in both the main telescope and the aiming device, the finder scope or reflex sight is properly aligned and ready to use. Verifying the aiming device's alignment should be one of the steps you go through each time you set up for an observing session. While most of the time an aiming device will retain its alignment, it's a good idea to check before each observing session to avoid frustration if the finder has been inadvertently bumped and misaligned.

Aligning Bracketed Green Laser Pointers

Aligning a bracketed green laser pointer with a telescope is easy to do. It should be done outdoors by aligning on a distant fixed target or a bright star.
First, point your telescope at a target that is 100 feet or further away. Using a low power telescope eyepiece, such as a 25mm focal length eyepiece, look through the telescope, and make sure that the target object is centered in the field of view. Then, turn the green laser pointer on by rotating the knurled metal thumbscrew on the on/off collar clockwise. Finally, use the adjustment thumbscrews of the bracket to adjust the green laser until it is pointing to the same target that the telescope is centered on.

If you have a higher power eyepiece you can repeat the procedure for enhanced precision. The narrower field of view provided by a higher power eyepiece will increase the accuracy of the laser's alignment with the main telescope.

Once the laser points to the same target that the telescope is centered on, the laser is aligned with the telescope. You're ready to use the green laser pointer with the telescope under the night sky.

So, Which Aiming Device is Best?
Deciding which type of finder scope or aiming device best suits your needs depends on a mixture of personal preference and desire for specialized features and functionality. Most telescopes include some type of aiming device right out of the box. Acquiring a different finder scope or aiming device can substantially improve your experience when using a telescope, as they can significantly improve ease-of-use. As you use your telescope, make note of whether or not you feel your current finder scope or aiming device is providing you with a comfortable and effective means of aiming. Chances are good there is a better finder available from Orion that can make pointing your telescope in the right direction a more pleasurable experience.

In closing, let's review the main factors to consider when shopping for an aiming device for your telescope:
  o    A finder scope or aiming device is used to accurately point the main telescope towards objects of interest
  o       Different designs of finder scopes and aiming devices provide different features and functionality that can significantly improve your experience
  o    The different designs available are:
  o    Straight through magnifying finder scopes with standard cross hairs
  o    Straight through magnifying finder scopes with illuminated-reticle cross hairs
  o    Right-angle correct-image magnifying finder scopes with standard cross hairs
  o    Right-angle correct-image magnifying finder scopes with illuminated-reticle cross hairs
  o    Non-magnifying reflex sights with a 'red-dot' aiming pattern
  o    Non-magnifying deluxe reflex sights with multiple aiming patterns and brightness settings
  o    Bracketed green laser pointers which emit a laser beam to help aim the telescope 
  o    Many amateur astronomers use more than one aiming device on a telescope
  o    The best aiming device(s) to use depends on you and your personal preferences in the hobby

Remember, Orion is here to help with any questions you have while shopping for a new finder scope or other telescope aiming device. Just send us an email at sales@telescope.com, contact us via live chat, or give us a call Toll-Free at 800-676-1343 and we'll help find the best aiming device for you!


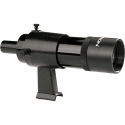
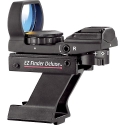
Achromatic Finder Red Dot Finder EZ Finder


Not Available
Benefits of Barlows
5.0 / 5.0

One of the more useful and cost-effective tools in an amateur astronomer's accessory case is a Barlow lens. Invented in the early 1800s by British mathematics professor Peter Barlow, it is a simple concave (negative) lens that, when placed between a telescope's objective lens or mirror and the telescope eyepiece, amplifies the magnifying power of the instrument.

If the standard eyepiece in your telescope yields a magnification of 50x, a 2x Barlow will boost that to 100x (50 x 2). If a high-power eyepieces in your scope yields 150x, insertion of a 2x Barlow lens before the eyepiece will boost that to 300x (150 x 2).

Barlow LensesA Barlow lens works by reducing the convergence of the light cone heading toward the telescope eyepiece. In this way it essentially increases the focal length of the telescope. Since magnification is determined by dividing the telescope's focal length by the eyepiece's focal length, you can see that by doubling the telescope's focal length, a Barlow lens doubles the magnification of the system for a given telescope eyepiece.

A Barlow lens is useful in several ways. First, it allows you to reach a higher maximum power. This is not always very beneficial, however, because the maximum useful power is generally limited not by the telescope or eyepiece but by prevailing atmospheric conditions ("seeing"). If atmospheric turbulence renders the image wavy and fuzzy at 150x, doubling the power to 300x is not going to help; it'll only degrade the image even more.

Barlows are particularly useful with telescopes that have short focal lengths. Such scopes often do not reach high powers even with fairly short focal-length telescope eyepieces. A Barlow lens can increase the magnification and allow the short focal length telescope to achieve its maximum useable power.

Perhaps the biggest benefit of a Barlow is that it doubles the number of magnifications available to you, effectively doubling the number of telescope eyepieces in your repertoire. If you have 26mm, 18mm, and 10mm eyepieces, for instance, adding a 2x Barlow will allow them to function as 13mm, 9mm, and 5mm eyepieces ? it's like getting three more eyepieces for the price of one Barlow lens (which often costs less than one telescope eyepiece)!

A less obvious but very nice perk of Barlow lenses is that they can make high-power viewing through a telescope more comfortable. High-power (short-focal-length) eyepieces often have very little eye relief, which requires that you position your eye very close to the lens to see the image comfortably. But a Barlow lens allows you to achieve the same magnification with a lower-power eyepiece, which typically has more eye relief. This can be a real benefit for eyeglass wearers, enabling them to see the whole field of view at higher powers, when normally they cannot. Also, many high-power telescope eyepieces feature very small eye lenses, which can be difficult to look into. Using a Barlow lens with a longer focal length telescope eyepiece allows you to enjoy the same magnification, but with a larger and more comfortable eye lens to peer into.

barlow in front of diagonalA 2x Barlow lens will actually provide 3x magnification when placed in front of the telescope diagonal on refractor, Schmidt-Cassegrain and Maksutov-Cassegrain telescopes.

Lastly, a precision-made Barlow with antireflection coatings can actually improve eyepiece performance, providing sharper images and reducing edge-of-field optical aberrations at the expense of only a two or three percent reduction in image brightness. In fact, many deluxe high-power eyepieces contain built-in Barlow lens elements to achieve their high magnifications.

Choices in Barlow Lenses
When selecting a Barlow lens, the first thing you need to determine is the barrel size of the telescope eyepieces you intend to use with it. (The barrel size is the diameter of the eyepiece tube that drops into the focuser. The most common eyepiece barrel size is 1.25"; some larger telescopes and some refractors can also use 2" eyepieces, and some inexpensive telescopes still use smaller 0.965" eyepieces.) Whatever the barrel size of your telescope eyepieces, you'll want to select a Barlow of the same diameter.

Barlows also come in different magnifications. The most common Barlow magnification is 2x, which means that it doubles the power of any eyepiece with which it's used. There are also 3x and 5x Barlows available, and even some in-between magnifications such as 1.5x and 2.5x.

barlow between diagonal and eyepieceA 2x Barlow lens provides 2x magnification when placed between the telescope diagonal and eyepiece.

Make sure you get a quality Barlow lens that is fully antireflection coated or fully multi-coated. Most cheap Barlows included with low-end department-store telescopes are virtually worthless due to their lack of antireflection coating and resulting poor performance.

Using a Barlow Lens
A Barlow is very simple to use: It is inserted in place of the telescope eyepiece in the focuser, and the eyepiece is then inserted into the Barlow itself. When the Barlow is inserted into the optical path you will need to refocus, and often the change of focus required is quite large. To avoid excessive refocusing, therefore, you may find it easiest to sequence through your eyepieces without the Barlow, then, if the object and conditions warrant higher power, insert the Barlow and run through your eyepieces again starting with the longest focal-length (lowest power) eyepiece. As with all visual observing, don't increase magnification to the point that the image becomes fuzzy. Once the image becomes fuzzy there is no more detail to be seen, and such empty magnification makes it more difficult to discern detail in celestial sights.

Use of a Barlow should be factored into your choice of telescope eyepieces. If you're just starting out, you'll find that most telescopes come with a single low-power eyepiece, often of about 25mm focal length or thereabouts. A good strategy is to purchase a 2x Barlow and a second eyepiece of about 1/3 the focal length of your first telescope eyepieces. (For example: if your first eyepiece is a 25mm eyepiece, your second eyepiece would therefore be in the range of 8mm to 10mm). Those two telescope eyepieces and a single 2x Barlow lens will give you a range of four different magnifications, from low power to relatively high power ? a very good way to get started!

Not Available